Restore Applications from Backup
The Backup VDC interface enables users to restore application data from backups, specifically to restore Microsoft SQL and Oracle databases.
Note: Before starting the SQL and Oracle database restore process, the user must turn to neoCloud support in order to prepare the infrastructure for the restore process to be successful. During application level restore, the solution works with direct network connection from the solution's component to the virtual machine where application data is being restored. Because of security reasons and ensuring isolation between the customer's infrastructure and neoCloud's infrastructure, these components from the solution have access only in the neoCloud infrastructure. Only in the case of application level restore, neoCloud administrators connect this component in the network of the customer's virtual data center.
Except for these two application, the solution supports integration with Microsoft Active Directory, Microsoft Exchange and Microsoft SharePoint, but the current software version does not support restoring data from these applications through the interface intended for the customers. To restore application data from these applications, customers can contact neoCloud Support to coordinate the restore process.
Searching for databases and choosing a restore point
The restore process for SQL and Oracle databases in identical, so in the given example of the documentation only SQL restore is provided.
Restoring SQL and Oracle databases is performed through the Items tab of the interface, where first of all the user can search or choose the SQL server and instance or Oracle server. In order to search, the name of the SQL/Oracle servers needs to be entered.
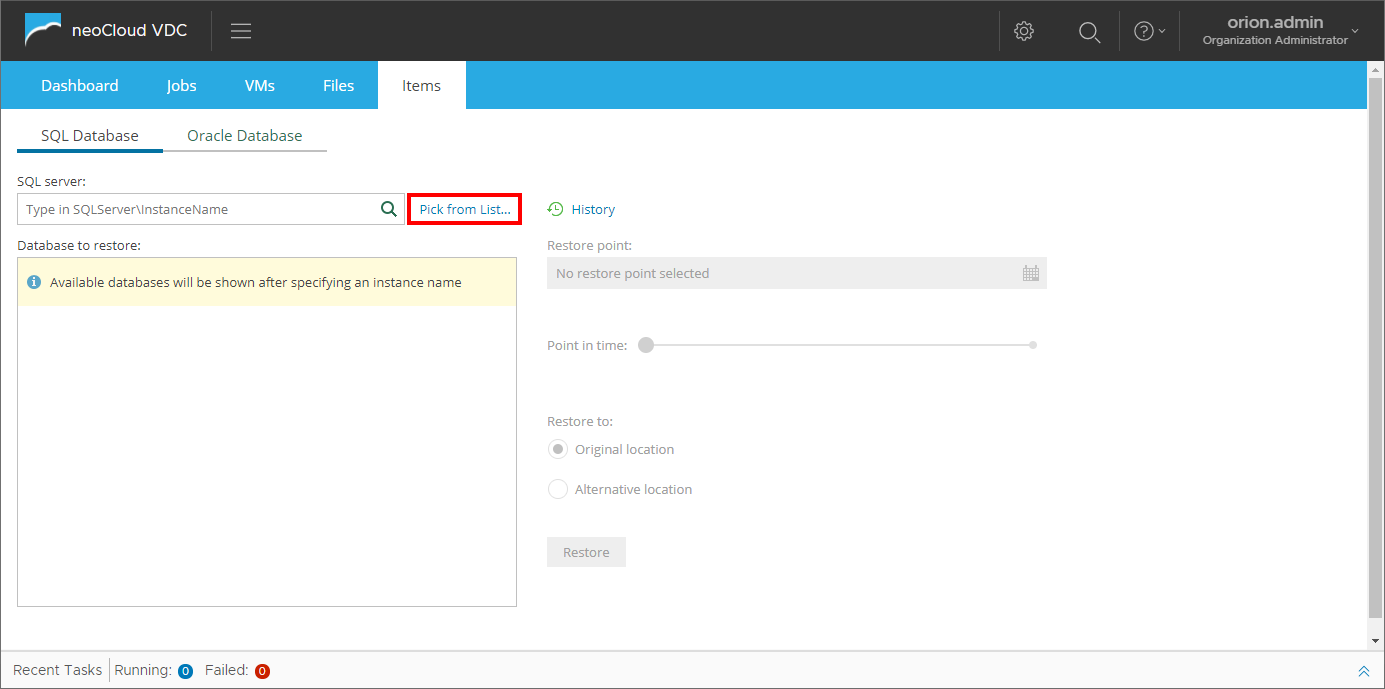
The Pick from List... option allows for choosing the necessary SQL/Oracle server from the list of available servers.

In the Database to restore list, a complete list of all databases on the selected SQL/Oracle server is shown.
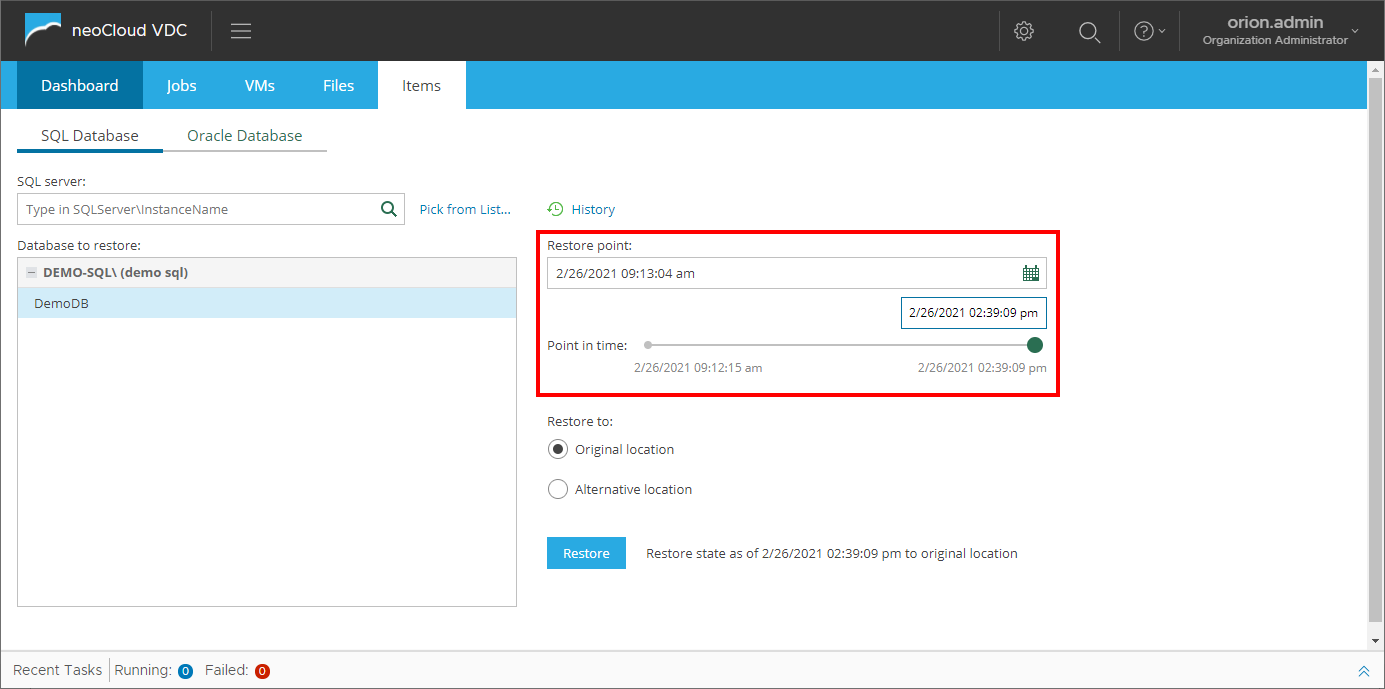
After selecting the database, on the right side of the interface the user can choose the restore point from which the database will be restored by clicking the calendar icon. This opens a small windows where the user can search for the required restore date (or nearby date). All dates where restore points are unavailable are greayed out and those which have a restore point are white. Additionally, if for a same date there are multiple restore points, they appear next to the calendar.
If the options Backup logs periodically (backed up logs are truncated) in SQL or Backup logs every... in Oracle are enabled in the backup job, the field and slider for choosing the exact time interval for restore is activated. Using this option enables for minimal data loss from the database, or in other words, only a few seconds before the issue has occured (for example a table is deleted, wrong data is entered in the database, etc.)
Restoring to the original location
This part of the documentation displays the usage of restoring to the original location option, for which Restore to: Original location needs to be selected. This option can be used in cases when the database is unavailable, a table has been deleted, wrong data has been entered and similar cases.
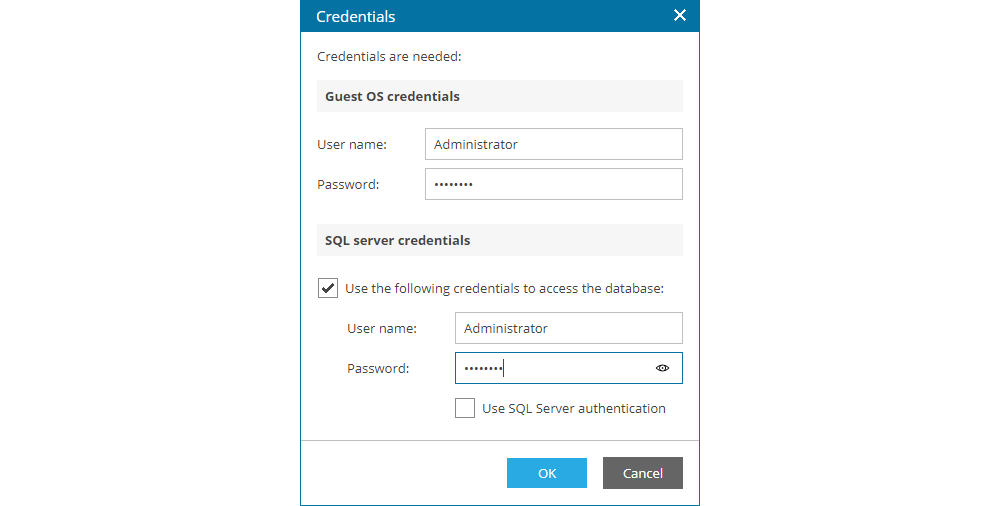
Clicking on Restore opens a new window where the user needs to enter the necessary login credentials for the operating system and for the SQL/Oracle server (if different credentials are used). With this option of the service, customers do not need to share operating system and application login credentials with neoCloud administrators at any point, ensuring data security.
Before initiating the actual database restore, the user is shown a warning that the existing database will be overwritten.

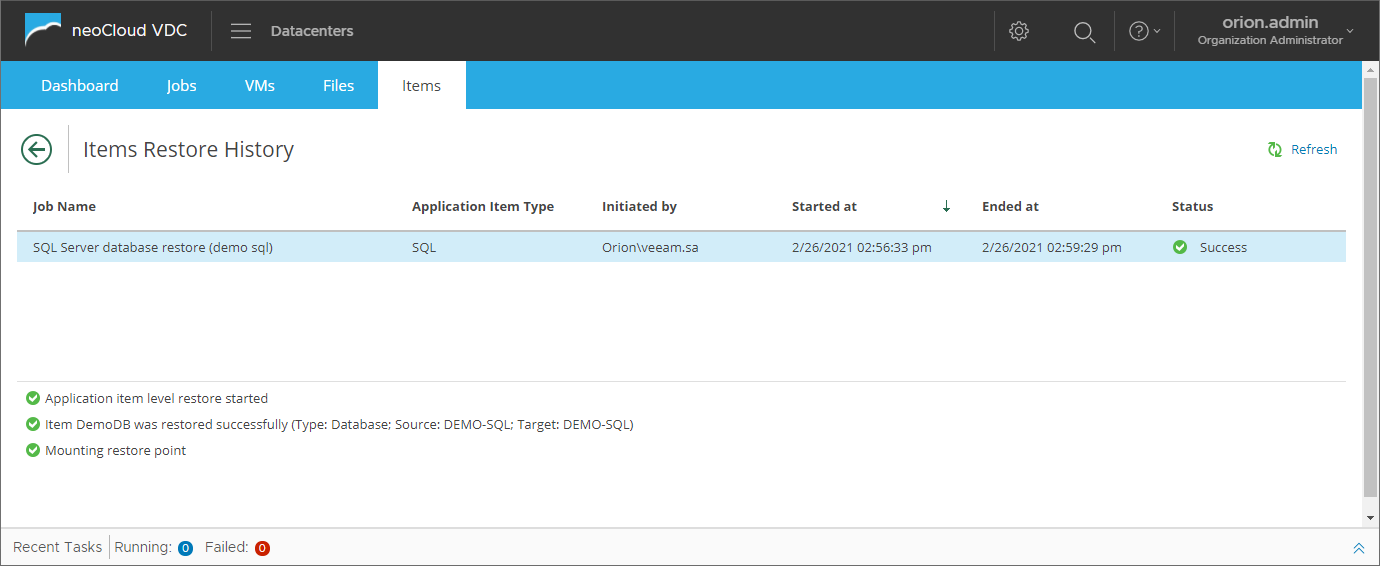
By confirming to continue with the restore, the user is provided with detailed information on the restore process.
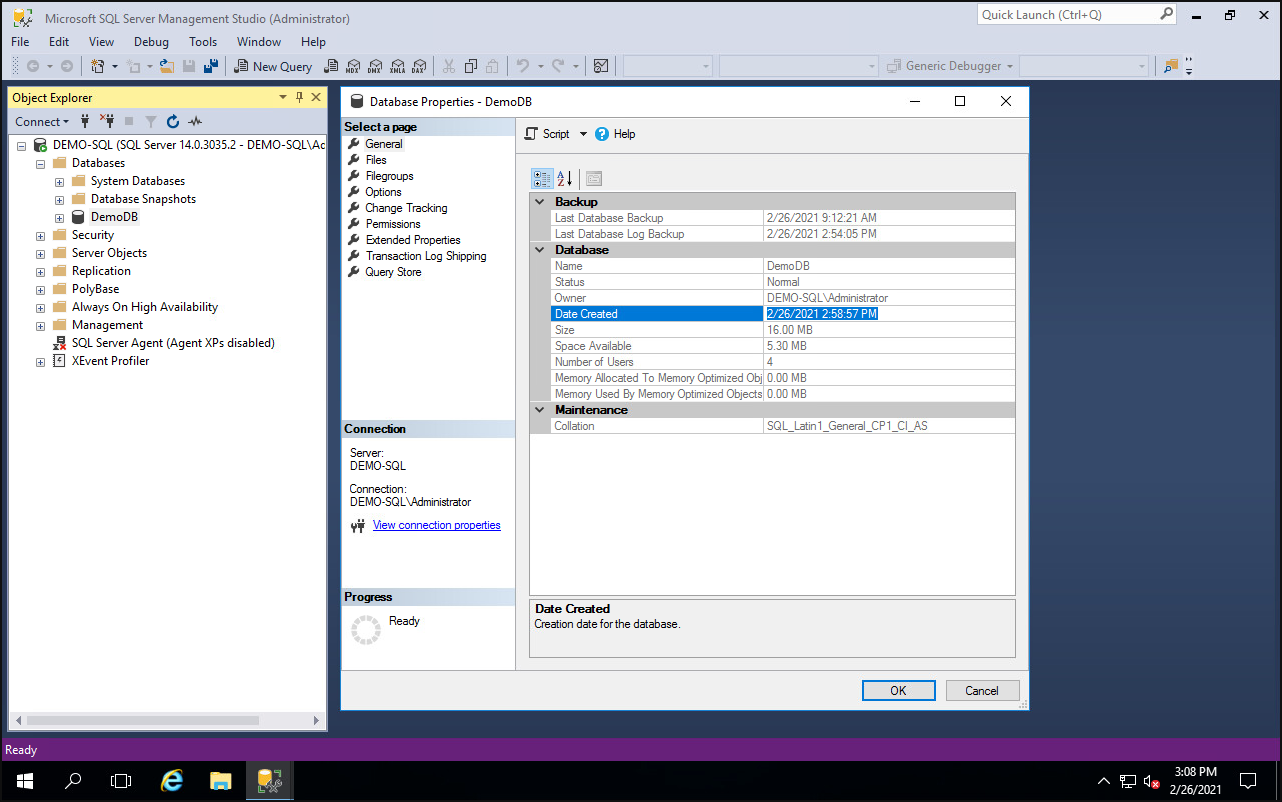
When the restore completes, the user can confirm in the application that the database is restored from backup. The following image is an example from a SQL server, showing that the database creation time corresponds to the restore process time.
Restoring to another location
This part of the documentation displays the usage of restoring to another location option, for which Restore to: Alternative location needs to be selected. This option can be utilized in cases such as testing and data analysis of data from a copy from the production database, database migration and similar cases. Restoring to another location can be performed on a new/another SQL/Oracle server or as a new database on the existing source server.
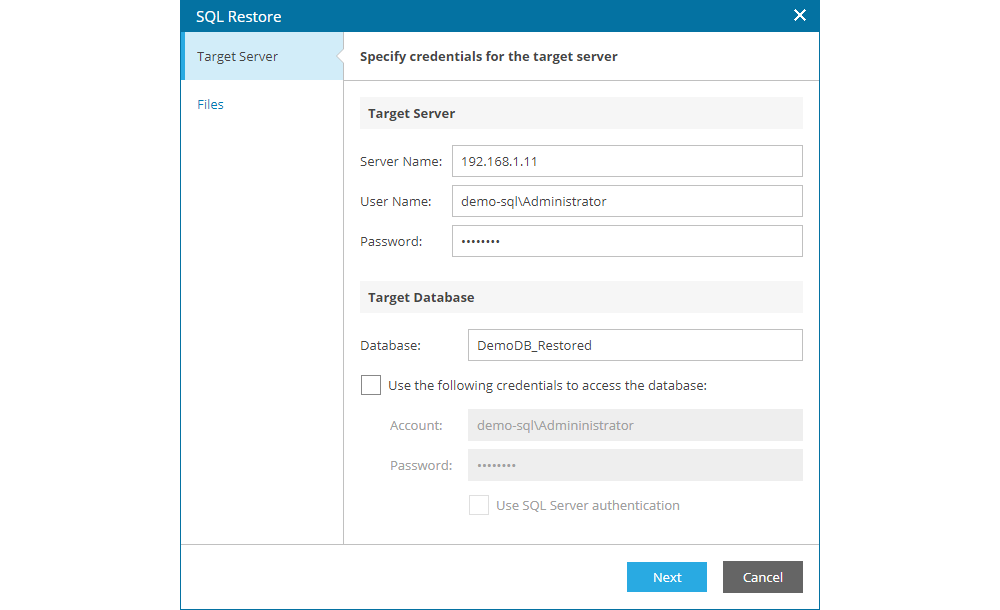
Clicking on Restore opens a new window where the user needs to enter the name or IP address of the server where the database will be restored, login credential for the operating system and for SQL/Oracle (if different credentials are used), as well as the name under which the database will be restored. With this option of the service, customers do not need to share operating system and application login credentials with neoCloud administrators at any point, ensuring data security.
Note: If the user restores the database to the same server as the production database, it is important to enter a different name from the production database in the target Database field.
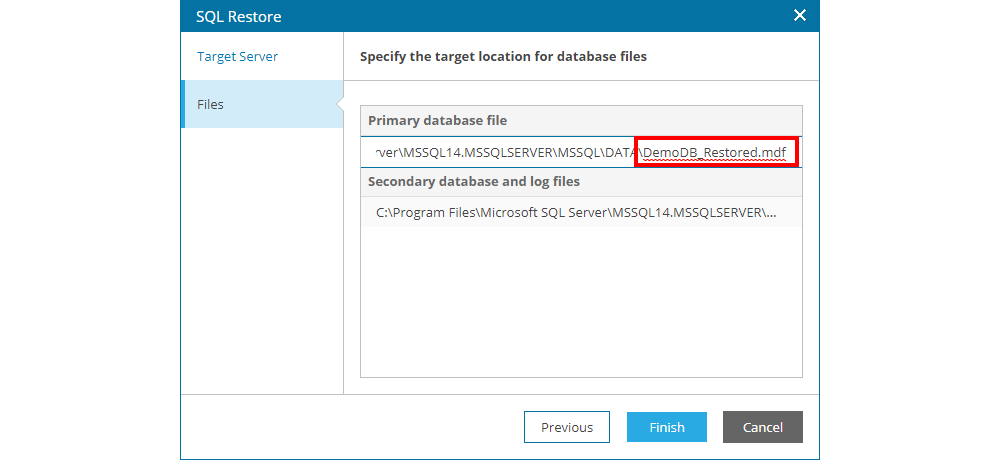
The next step shows the paths and names of the SQL or Oracle data files (database and logs), where the user has the option to change the path and names of these files.
Note: If the user restores the database to the same server as the production database, it is important to change the names of the database files in order to avoid the existing production database.
By clicking on Finish the user confirms to continue with the restore process, after which detailed information on the restore process is provided.
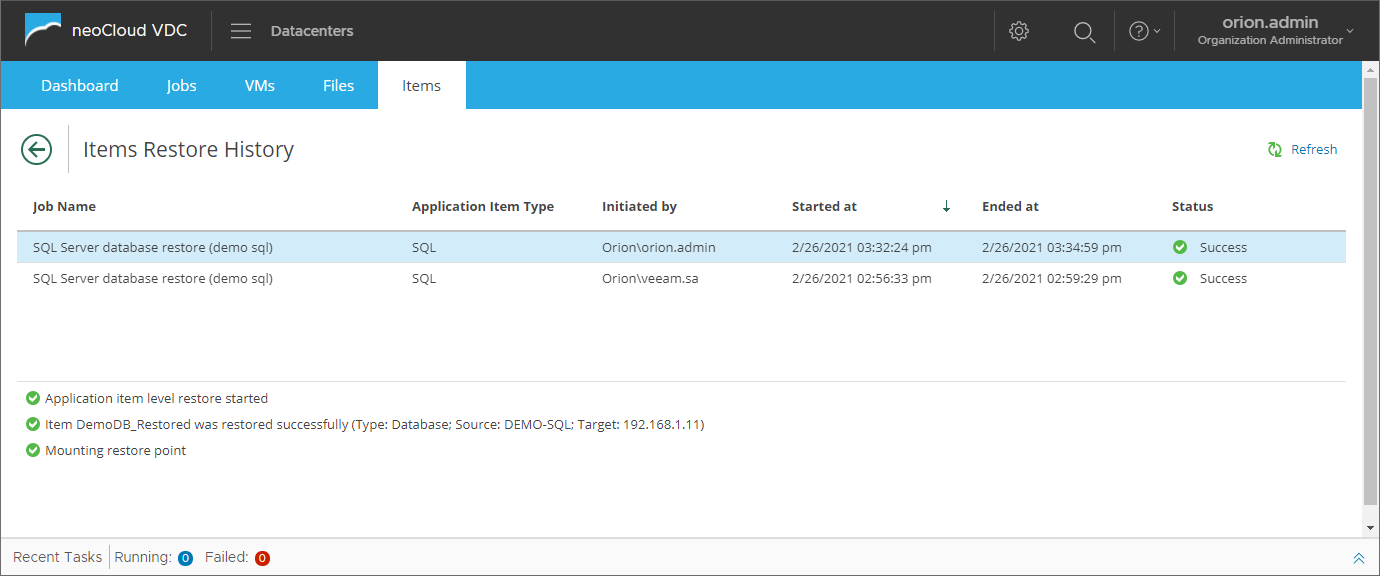
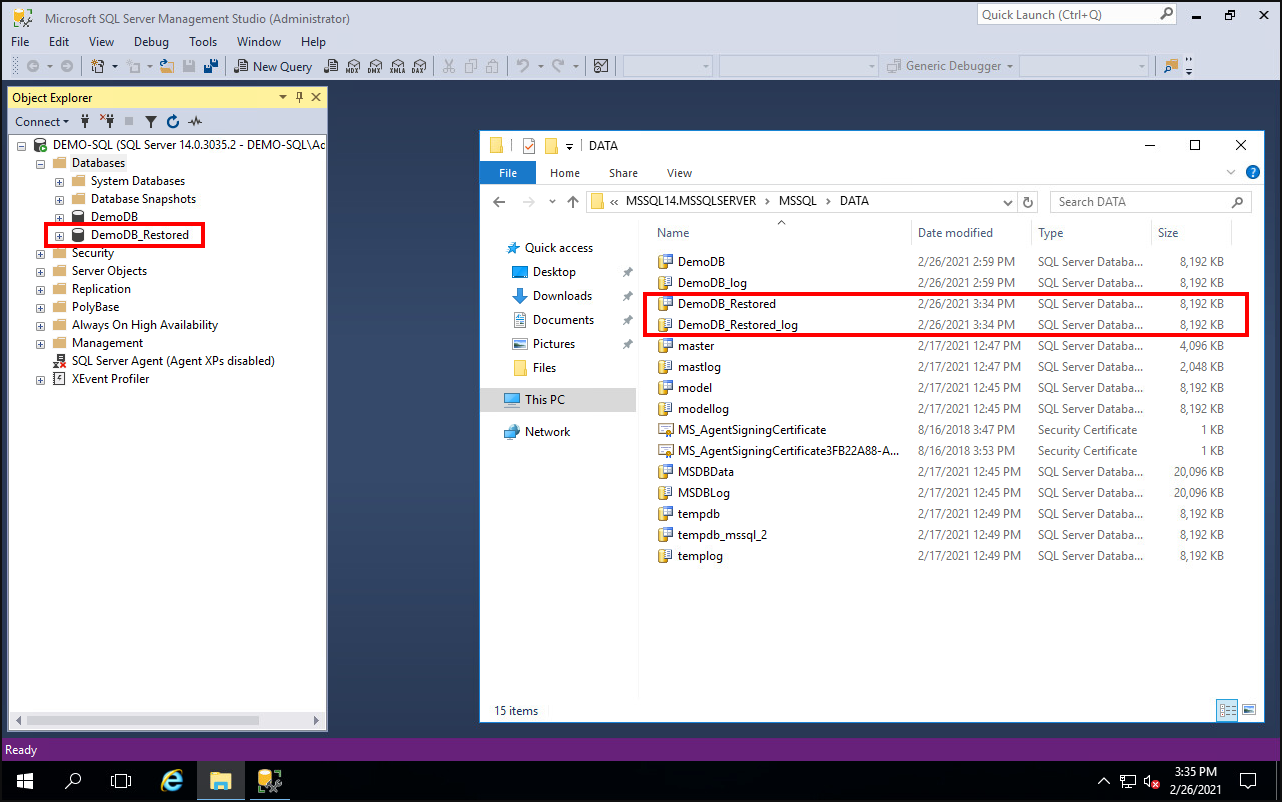
When the restore completes, the user can confirm that the database is restored from backup as a new database in the application. The following image is an example from a SQL server, showing the newly created database in SQL Server and the database files are available in the file system path.
