Restore Virtual Machines from Backup
The Backup VDC interface allows for customers to restore entire virtual applications or individual virtual machines, as well as restore single disk from a virtual machine.
Restoring virtual applications and virtual machines
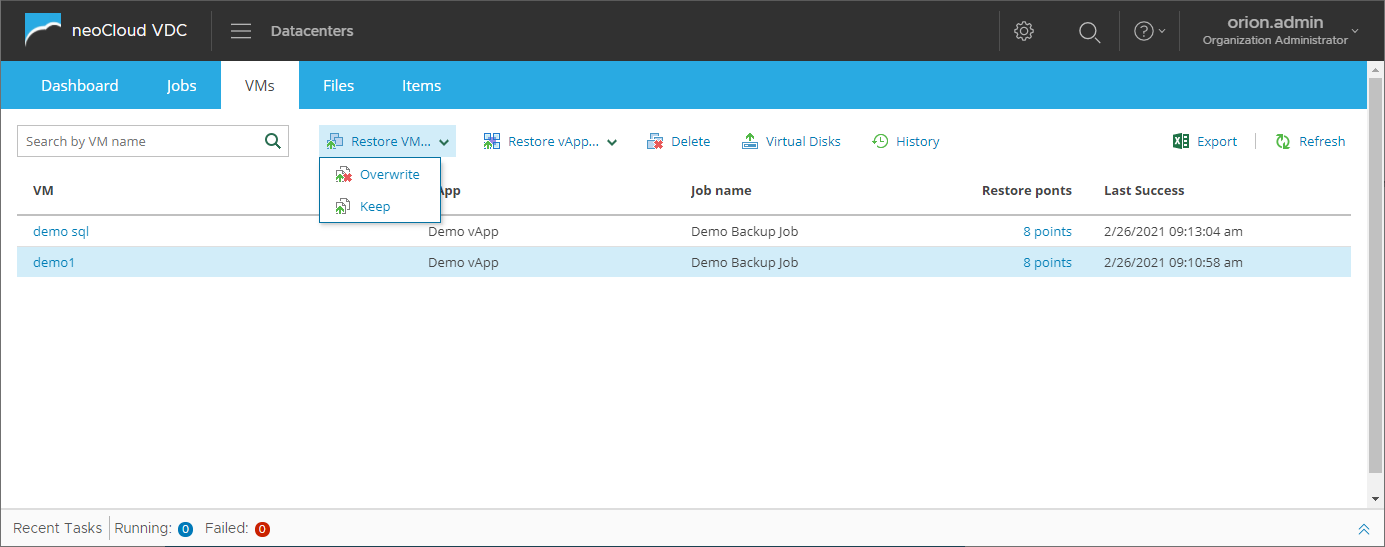
The VMs tab of the Backup VDC interface shows all virtual machines for which backup points exist. In the column Restore Points, the user may see the number of available restore points and with clicking the number may preview the time of the restore point and detailed information of the job execution in context to the selected virtual machine.
By clicking one of the virtual machines, the following options become available:
- Restore VM... menu for initiating a virtual machine restore process either on the original location by Overwriting the existing virtual machine or as a new virtual machine by Keeping the existing virtual machine
- Restore vApp... menu for initiating a virtual application with multiple virtual machines restore process either on the original location by Overwriting the existing virtual application or as a new virtual application by Keeping the existing virtual application
- Delete for removing the backups (restore points) of a virtual machine
- Virtual Disk option for restoring individual virtual machine disk
- History for overview of previous virtual machine restore processes
The process for restoring a virtual machine on the original location or as a new virtual machine is same. In the provided example, the Keep virtual machine option is used.
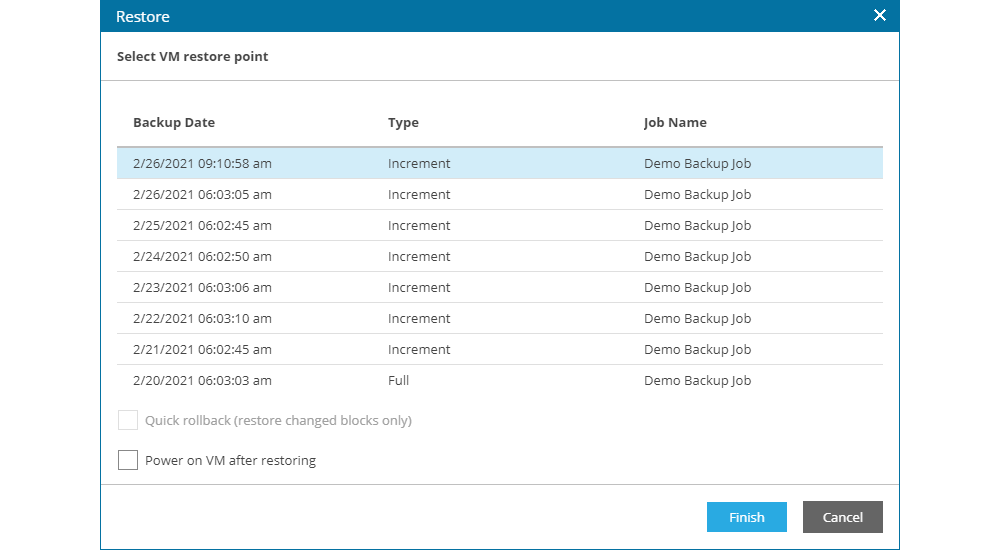
By choosing the Overwrite or Keep option, a new windows opens where in one simple step the user need to define the following parameters:
- Chose the restore point from which the virtual machine need to be restored
- Enable the Quick Rollback option (available only in Overwrite) for restoring only the changed blocks, speeding up the restore process in most cases
- Enable if the virtual machine need to be powered on once the restore completes
By clicking the Finish button, the actual virtual machine restoring begins.
The user is automatically taken to the preview of the detailed steps of the restore, which allows for monitoring of the process.
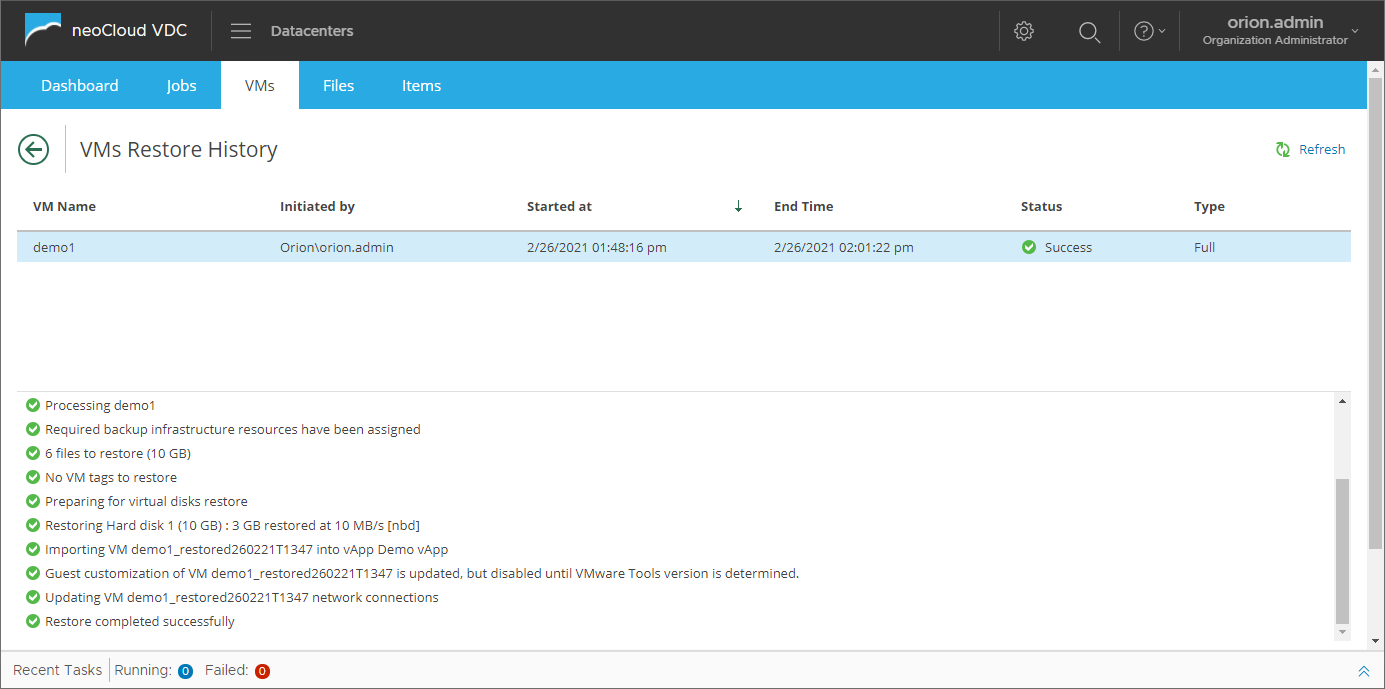
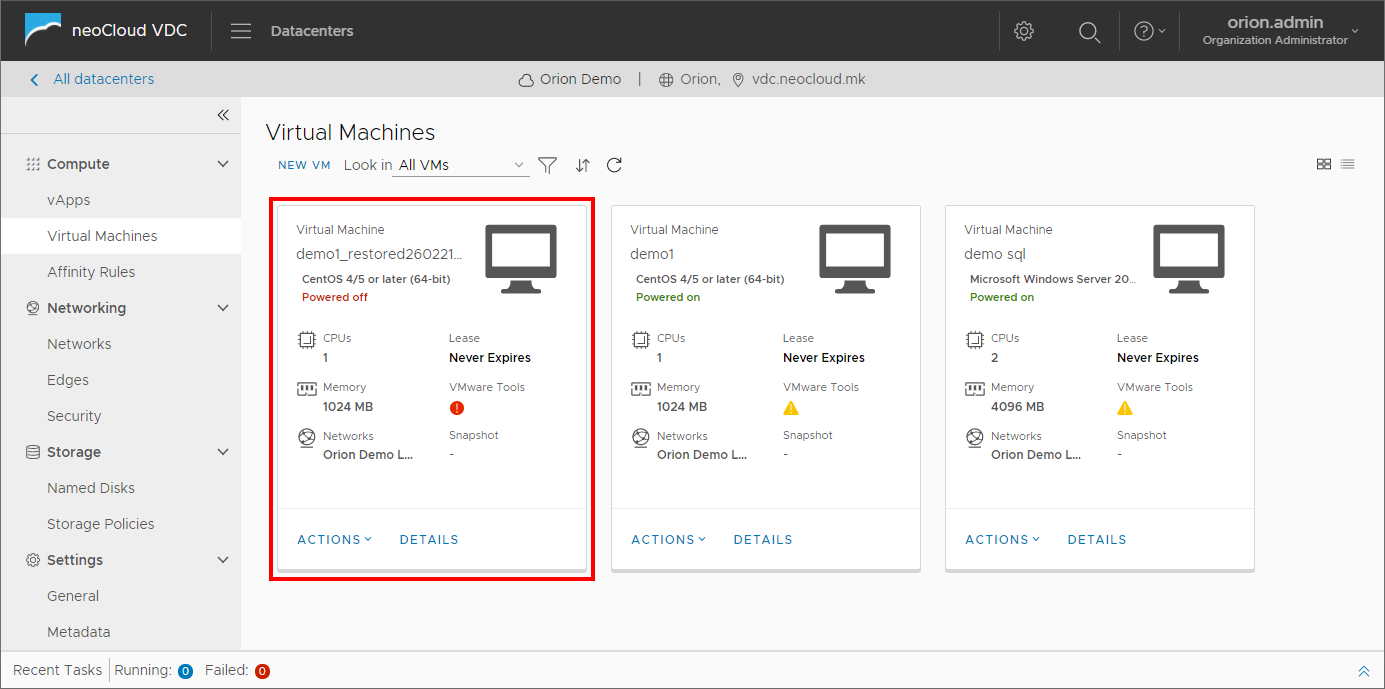
Once the restore process completes, the user can see and interact with the virtual machine in the VDC interface.
Restoring virtual machine disks
The Virtual Disk option in the VMs tab of the interface allows for restoring virtual machines individual disks from backups. This option can be used in cases when a disk from a virtual machine is corrupted, unintentionally formated, when larger amount of data is deleted and similar cases.
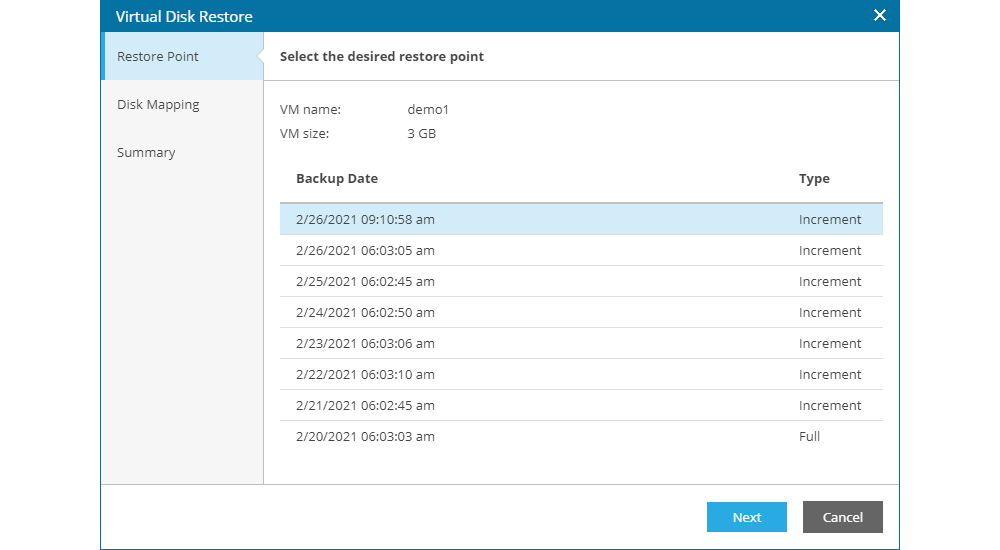
By clicking on Virtual Disk, a new windows opens where the first step of the process is to select the point from which the virtual disk will be restored.
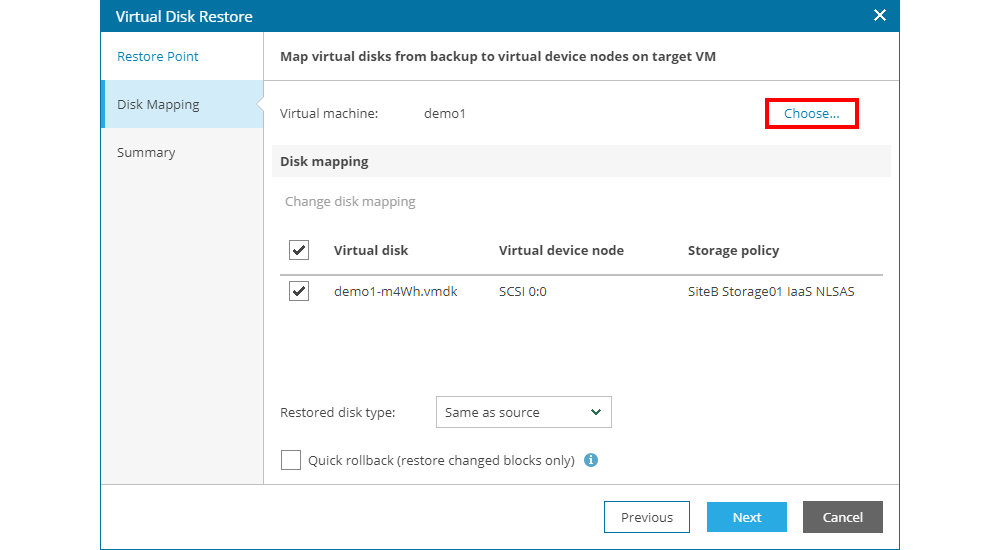
In the second step the user needs to map the disk from the backup to a disk that will be overwritten by the restore process. By clicking on Choose..., the user selects a virtual machine on which the disk will be attached, while in the window of the process the user selects on of the available disks from the backup.
The Quick Rollback option serves for restoring only the changed blocks, which is speeding up the restore process in most cases. With the Restored Disk Type option, the user can choose if the restored disk will be Thin, Thick or in the same format as the source disk (the predefined and most used selection).
Before proceeding, the user is shown a warning that the existing disk from the virtual machine will be deleted and replaced by the disk from the backup.

If the virtual machine is powered on, the user is shown a warning that it will be powered off while restoring the disk.

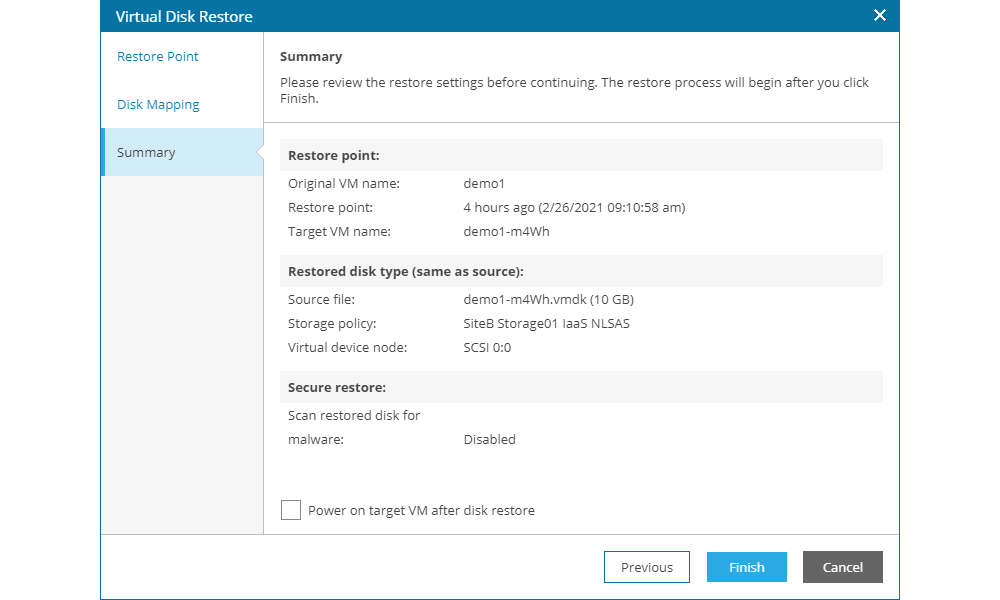
Before initiating the actual restoration of the disk, as a last step of the process in the Summary screen with overview of the selected restore parameters, as well as the option to power on the virtual machine once the restore completes.
